
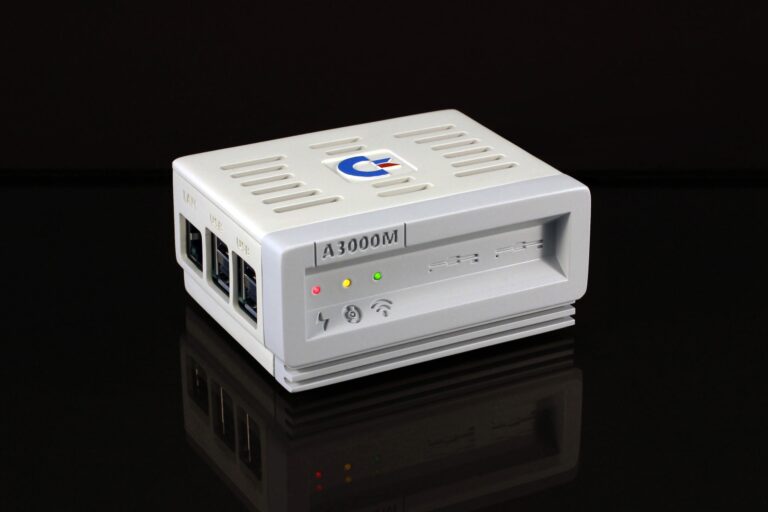
The Amiga 3000 Mini is a Raspberry Pi in a miniature Amiga 3000 case, a design of my own. I no longer make or sell it, but the 3D model files stay free to download, so anyone with a 3D printer can build one. This article shows what the little machine does, what went into the case and how to build your own.
What the Amiga 3000 Mini Does
- A classic Amiga on your desk: with Amibian, the Raspberry Pi emulates Amiga machines such as the Amiga 500, 2000, 3000, 4000 and the CD32, with Workbench and your favourite games.
- Old game consoles too: with RetroPie, the same box runs emulators for a large number of old consoles and home computers, from Nintendo and Sega to the PlayStation.
- Status at a glance: three LEDs in the front, as on the real machine. Red shows power, yellow shows SD card and USB mass storage access, green shows network activity over LAN or Wi-Fi.
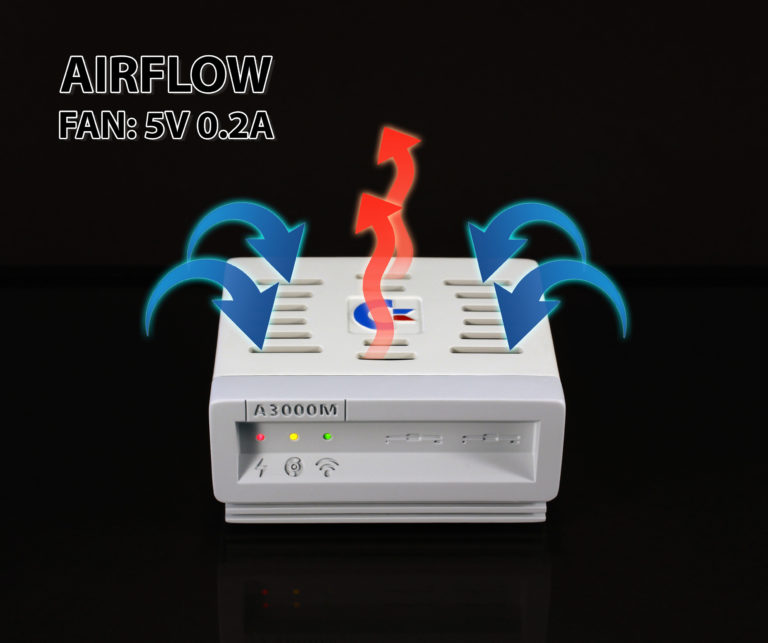
- Active cooling: a small 5 V fan under the vented top keeps the Raspberry Pi cool.


The Case
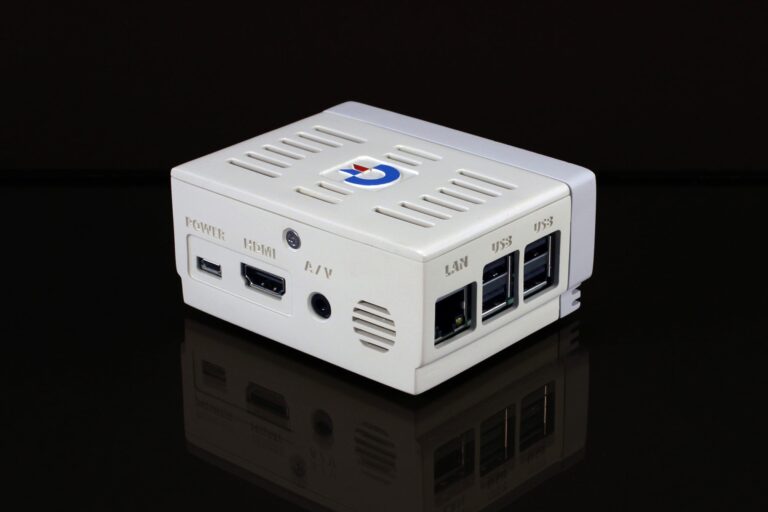
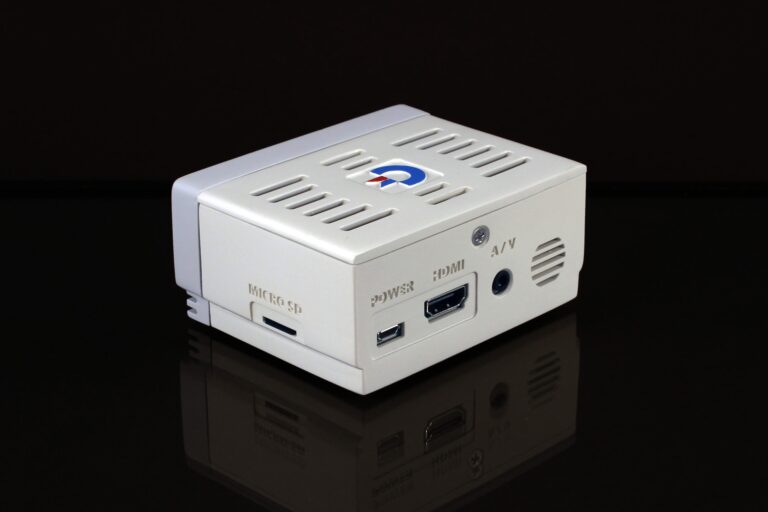
The case has three parts and fits the Raspberry Pi 2, 3 and 4. I printed each one in UV-sensitive synthetic resin, then sanded it and finished it with acrylic lacquer. The openings in the back and side line up with the ports of the Raspberry Pi, so USB, LAN, HDMI and the audio/video jack stay usable with the case closed.
A 30 x 30 x 10 mm fan (5 V, 0.2 A) sits under the top. It draws cool air in through the side vents and pushes warm air out through the top.
Build Your Own
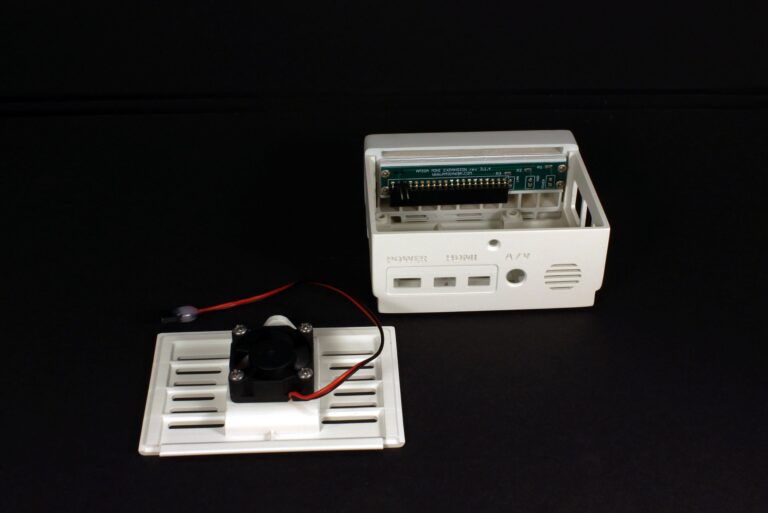
The 3D model files are free on Thingiverse, in two versions:
- Amiga 3000 Mini for the Raspberry Pi 2 and 3 (Thingiverse)
- Amiga 3000 Mini for the Raspberry Pi 4 (Thingiverse)
This video shows the most important assembly steps: Amiga 3000 Mini Construction Kit Assembly Instructions (YouTube).
The Parts List
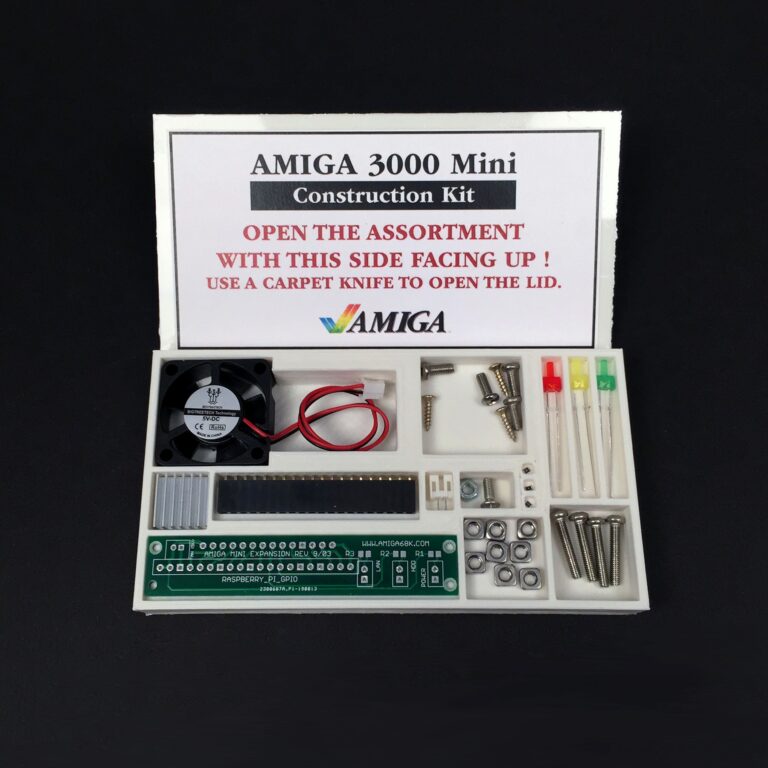
I used to sell a construction set with the parts that go with the printed case. It is no longer in the shop, but on request I will gladly put one together for you. Its list shows what you need besides the printed parts and a Raspberry Pi:
- 1x PCB for the front panel, with a 20-pin angled pin header
- 3x LEDs (red, yellow, green) and 3x SMD resistors
- 1x fan 5 V / 0.2 A (30 x 30 x 10 mm) and a 2-pin fan socket
- 1x CPU heat sink
- 1x M3 screw and 1x M3 hex nut for the cover
- 3x screws for the PCB, 4x long screws for the fan, 4x small screws for the Raspberry Pi
- 8x square nuts
For power, use a standard USB power supply for the Raspberry Pi that delivers at least 2.5 A; 3 A is even better.
Conclusion
The Amiga 3000 Mini is a small tribute to one of the most elegant Amigas, and a neat home for an Amiga or retro game emulator. Download the files for your Raspberry Pi from Thingiverse, print the case and fit it with the parts above. I recommend a resin printer, because the case is small and full of fine detail. Whether it can be made on an FDM printer, I cannot say.